
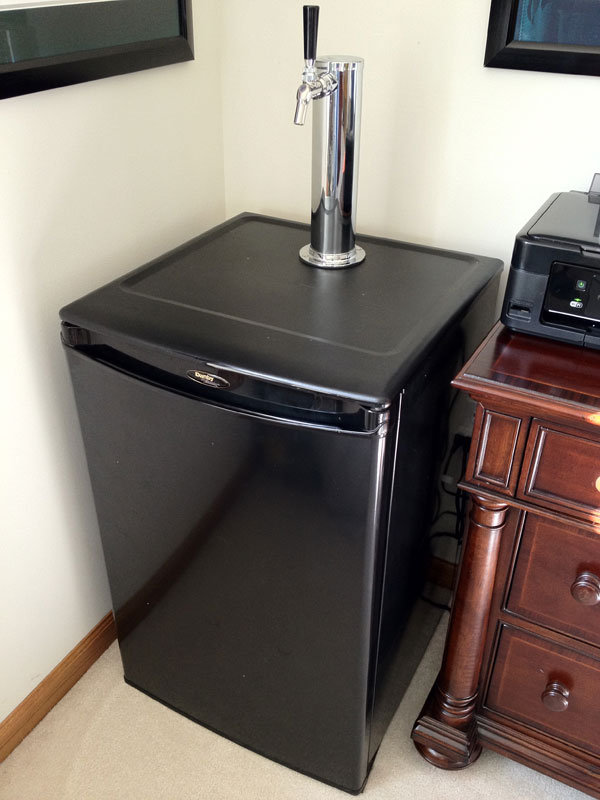
Recently I was given a Danby DAR452BL mini fridge by a friend. This fridge lacked a freezer compartment and made the perfect base to for a kegerator project. I first tested it over night to see how cold it could really get, I needed it to hold in the low 30’s. Anything below 30F would result in frozen beer, and anything over 38F would cause excessive foaming as the co2 escapes the beer. I made two modifications to the fridge itself after removing all the shelves and the light bulb.
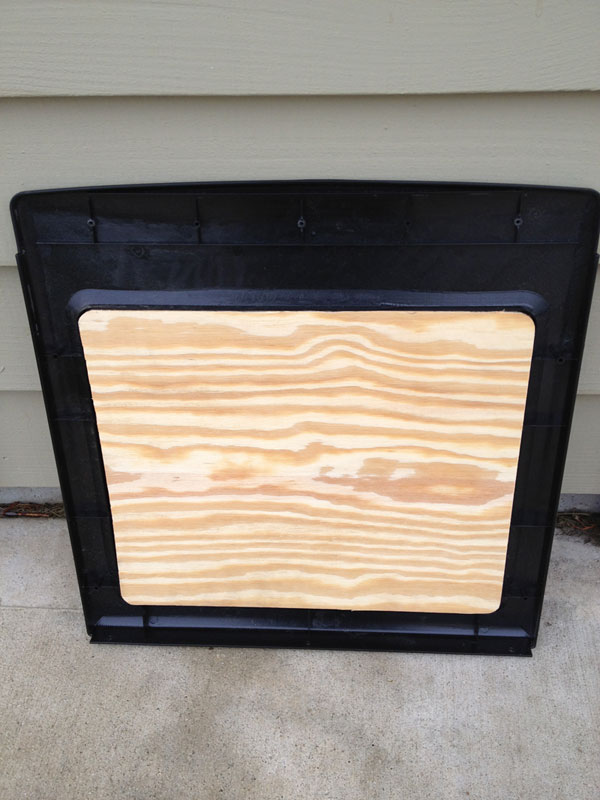
I removed the plastic top and used a dremel tool to cut out the plastic webbing from the underside of the top in the center section. After sanding down the plastic area I used a plastic bonding compound to cement in a piece of 3/8″ plywood that was cut to shape the opening. I let that set for over 24 hours with pressure holding the two pieces together. This removed the gap between the plastic and the metal shell and gave structural rigidity to the tower and faucet.
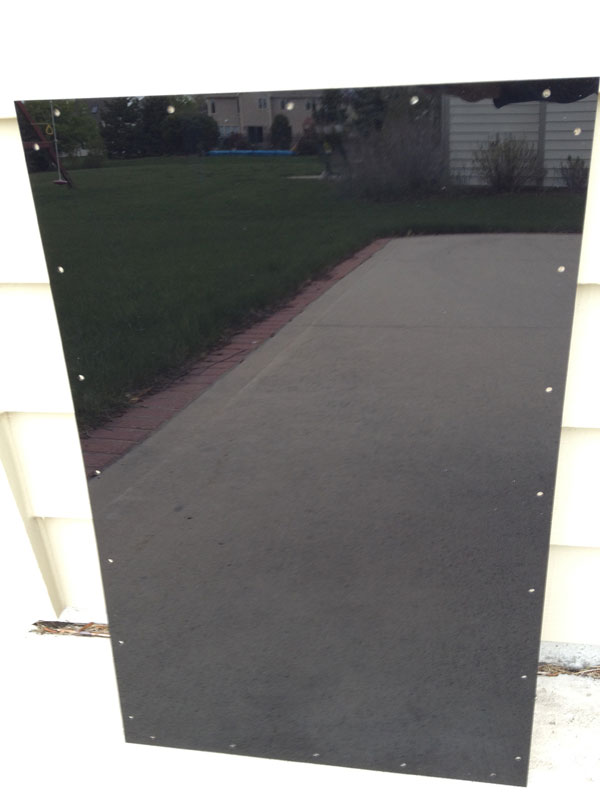
I also had a 1/4″ sheet of gloss black acrylic plastic cut to match the inside door panel. I drilled holes to match the mount points with a drill press and replaced replaced the inside door panel with it. The original inside door panel protruded into the fridge and also activated the light assembly. This new panel gave it a sleek look and more space inside the fridge. I had removed the bulb so it was not constantly on.
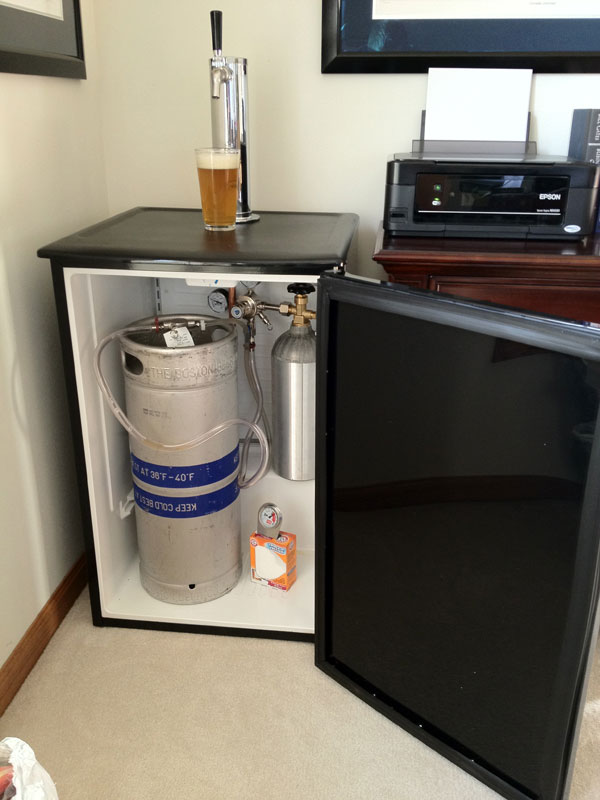
There was enough room to easily fit a 1/6th Keg which is about 5.25 gallons (42 pints). I had ordered a 1/6th Keg of Sam Adams Summer Ale as my first test keg so it was ready when my project was completed.
I had purchased a custom conversion kit from beveragefactory.com. Their customer service was top notch, I highly recommend them. I upgraded the tower to a 3″ Stainless Steel version and chose a Perlick 525SS faucet and lowboy coupler. After it arrived I filled up the co2 tank at a local liquor store and picked up some 1/2″ copper tubing to run the beer line through.
After putting the fridge back together I carefully measured for the center and the best place to drill. I knew this particular model did not have freon lines in the top, but you can easily render a mini fridge useless if you drill without any research or planning. I used a 3/4″ drill bit and slowly drills through the plastic, wood, metal, insulation, and metal layers. After measuring and testing the length I placed the beer line in the copper tube and set the tower on the top running the line into the fridge. I used the copper pipe to conduct the cold temperatures as high as possible up into the tower. It also helps to stabilize the co2 tank on the small shelf in the back of the fridge.
Once everything was set I measured what seemed to feel like 100 times for each of the four holes to mount the tower securely. I can say with out a doubt the tower is perfectly center and facing exactly forward.
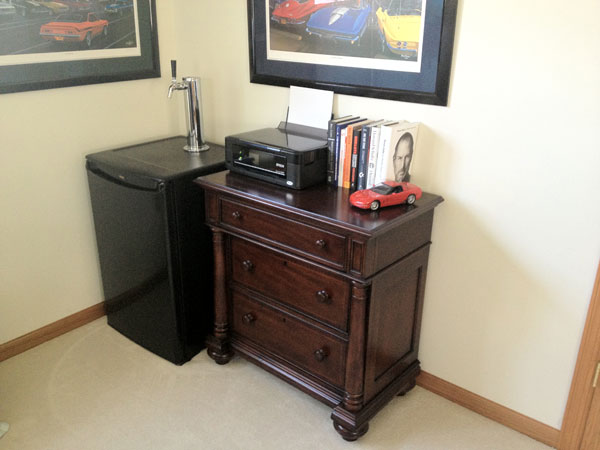
Prior to picking up the Keg I had the kegerator powered on and down to temperature. I placed the keg inside it immediately and let it sit overnight to settle. The Perlick lowboy coupler is a little weird and I learned the hard way how the beer valve opens and closes. Once I nailed down the functionality of it, tapping the keg was a piece of cake.
The largest issues I ran into were dialing in the perfect temperature and co2 pressure. I’ve found the co2 pressure is best around 7psi. The temperature was too hard to dial in with the built in controller. I ended up picking up a Johnson Controls a419 digital controller from the local Northern Brewer store. The temperature stays consistently between 31F and 33F.